> For the complete documentation index, see [llms.txt](https://docs.remote.it/llms.txt). Markdown versions of documentation pages are available by appending `.md` to page URLs; this page is available as [Markdown](https://docs.remote.it/introduction/get-started/starlink.md).
# Remote Access Over Starlink
Reach cameras, DVRs, NAS boxes and PCs behind a Starlink connection. Starlink uses CGNAT, so port forwarding can't work — Remote.It gets you in without it.
If you have Starlink at a cabin, farm, boat, RV or job site, you have probably already discovered that you cannot get to your cameras, DVR or computers from somewhere else. Port forwarding in your router does nothing, and support articles that tell you to "open a port" don't apply.
Remote.It solves this. This guide walks through the whole setup in plain language. No networking experience needed.
## Why port forwarding doesn't work on Starlink
Starlink puts your connection behind **CGNAT** (Carrier-Grade NAT). Cellular and most other satellite providers do the same thing.
In plain terms: your Starlink router does not get its own address on the public internet. It shares one with many other customers. So there is no address anywhere in the world that points at your network, and nothing for a forwarded port to attach to.
Remote.It doesn't need one. Instead of you reaching in from outside, the Remote.It software on your network reaches **out** and stays in touch. When you want to connect, the two ends meet in the middle. Nothing on your network is exposed to the internet, and no ports are opened in your router.
## What you'll need
* **One computer that stays powered on**, on the same network as the things you want to reach. A Windows PC, Mac, Raspberry Pi or Linux machine all work. This is the only place Remote.It gets installed.
* **A free** [**Remote.It account**](https://app.remote.it).
* **The local IP address and port** of each device you want to reach — your camera, DVR/NVR, NAS, thermostat, and so on. Step 3 below shows how to find these.
{% hint style="info" %}
**The most common point of confusion: where does the software go?**
Remote.It gets installed **once**, on one always-on computer sitting on the same network as your cameras or DVR. That computer becomes your way in.
You do **not** install it on the camera or DVR itself — those devices don't accept software. And you do **not** install it on the phone, tablet or laptop you'll be using while you're away. On that end you just sign in to the Remote.It app.
{% endhint %}
## Setting it up
{% stepper %}
{% step %}
## Create your account
Sign up at [app.remote.it](https://app.remote.it). The free plan is enough for a typical home or small site.
{% endstep %}
{% step %}
## Install Remote.It on the computer that stays on
This computer has to be on the same network as your cameras or DVR — plugged into, or on Wi-Fi from, the same Starlink router.
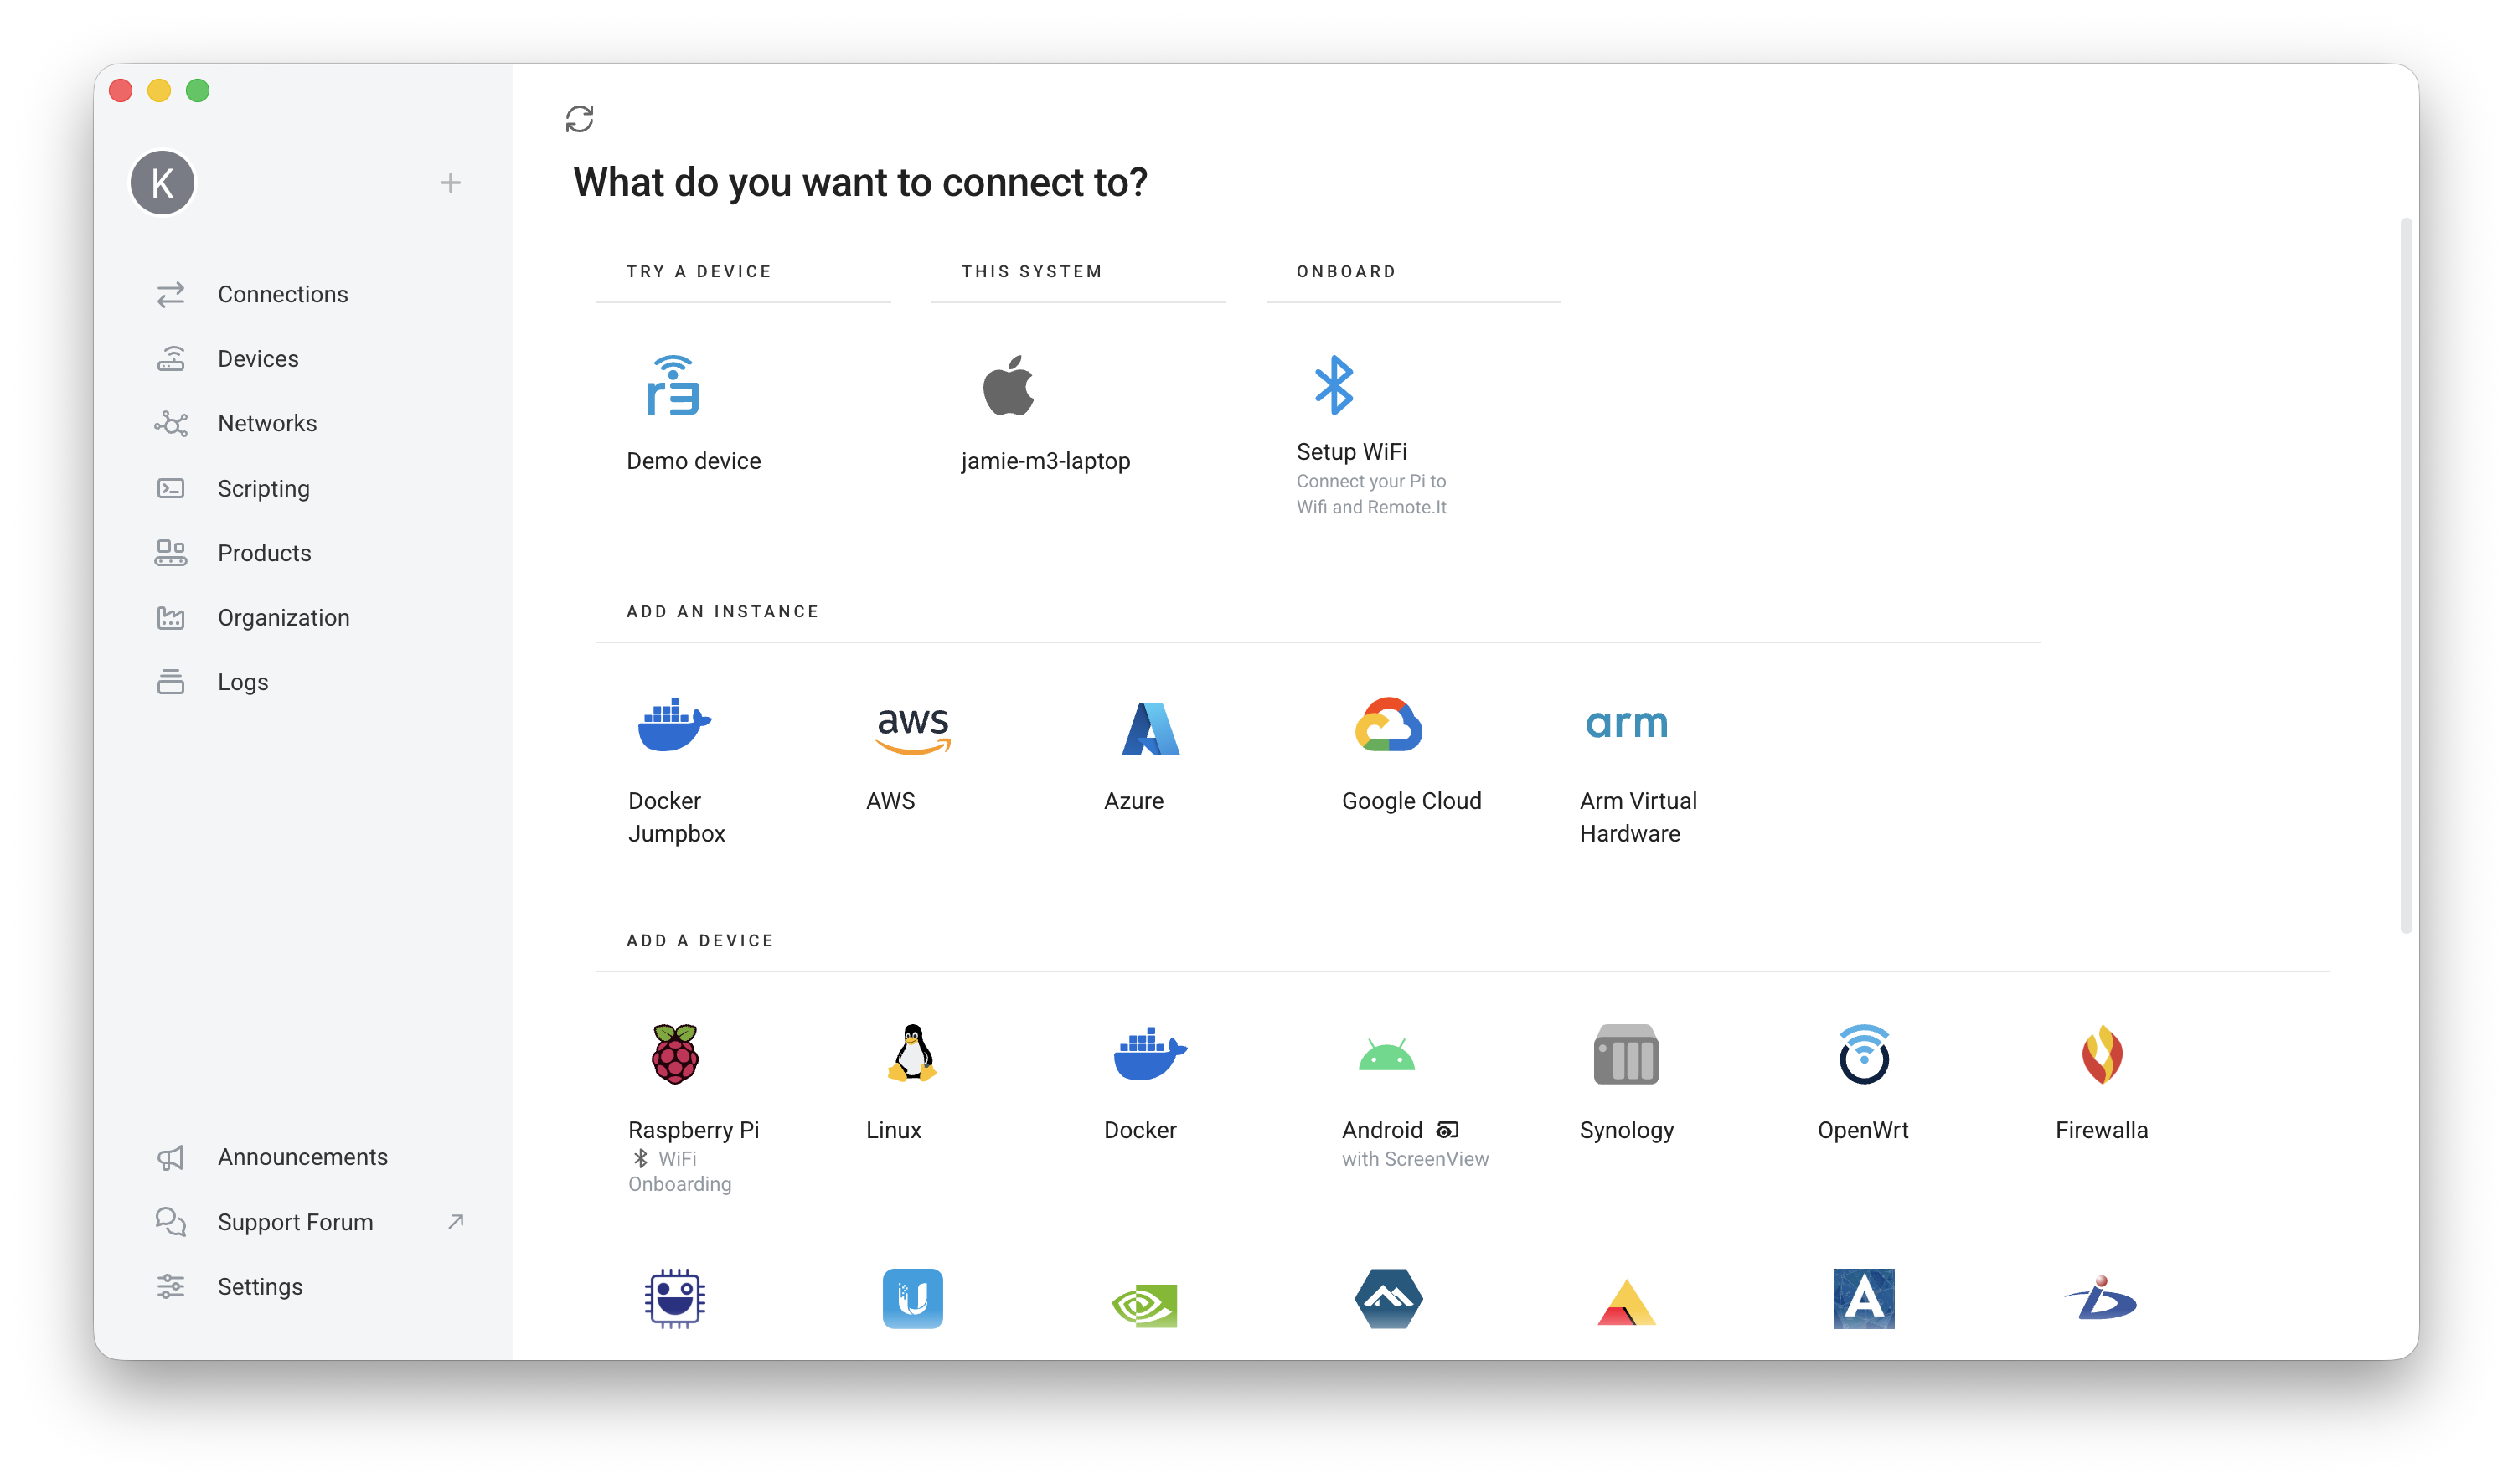
Install the [Desktop app](/software/desktop/overview-and-installation.md) on it and sign in. Then click the **+** button at the top of the sidebar. On the **What do you want to connect to?** screen, look under **This System** and click your computer's name.
Give it a name you'll recognize later — `Cabin PC`, `Shop Computer`, `Barn Pi` — and click **Add Device**.
That machine now appears in your device list, reachable from any browser or phone, anywhere in the world.
{% hint style="info" %}
Using a Raspberry Pi or another Linux box as the always-on machine? Pick it from the **Add a Device** row lower down the same screen instead, and copy the one-line install command it gives you. See [Platforms & Packages](/introduction/get-started/platforms-and-packages.md) for the full list of supported hardware.
{% endhint %}
If all you wanted was remote access to that one computer, you're done — skip ahead to the last step. To reach your cameras or DVR, keep going.
{% endstep %}
{% step %}
## Find the address and port of the device you want to reach
Every device on your local network has a **local IP address** — four numbers separated by dots, usually starting with `192.168.` or `10.`. Your camera or DVR also listens on a **port**, which is just a number.
You can usually find both in:
* The device's own phone app or setup screen, often under Network or Status.
* Your Starlink app or router's list of connected devices.
* The manual or the sticker on the device.
Typical values:
| What you want to reach | Common port |
| ------------------------------ | ----------- |
| Camera or DVR web page (http) | `80` |
| Camera or DVR web page (https) | `443` |
| Camera or DVR phone-app port | `8000` |
| NAS web page (Synology, QNAP) | `5000` |
| Windows remote desktop | `3389` |
So a DVR might be `192.168.1.64` on port `80`. Write down one line like that for each device you want to reach.
{% hint style="warning" %}
Give these devices a fixed address so they don't move. Most routers call this a DHCP reservation or static lease. Otherwise the address can change after a power cut and your connection will stop working.
{% endhint %}
{% endstep %}
{% step %}
## Add a service for each device you want to reach
This is the step that answers "where do I enter my IP and ports?"
A **service** is one thing you want to reach — a camera's web page, a DVR's app port, a NAS. You add services to the computer from the previous step, and point each one at a device on the local network. Remote.It calls this a [jump service](/features/connection-options/jump-service.md): your always-on computer relays the connection on to the other device. You may also see it called a "jump box."
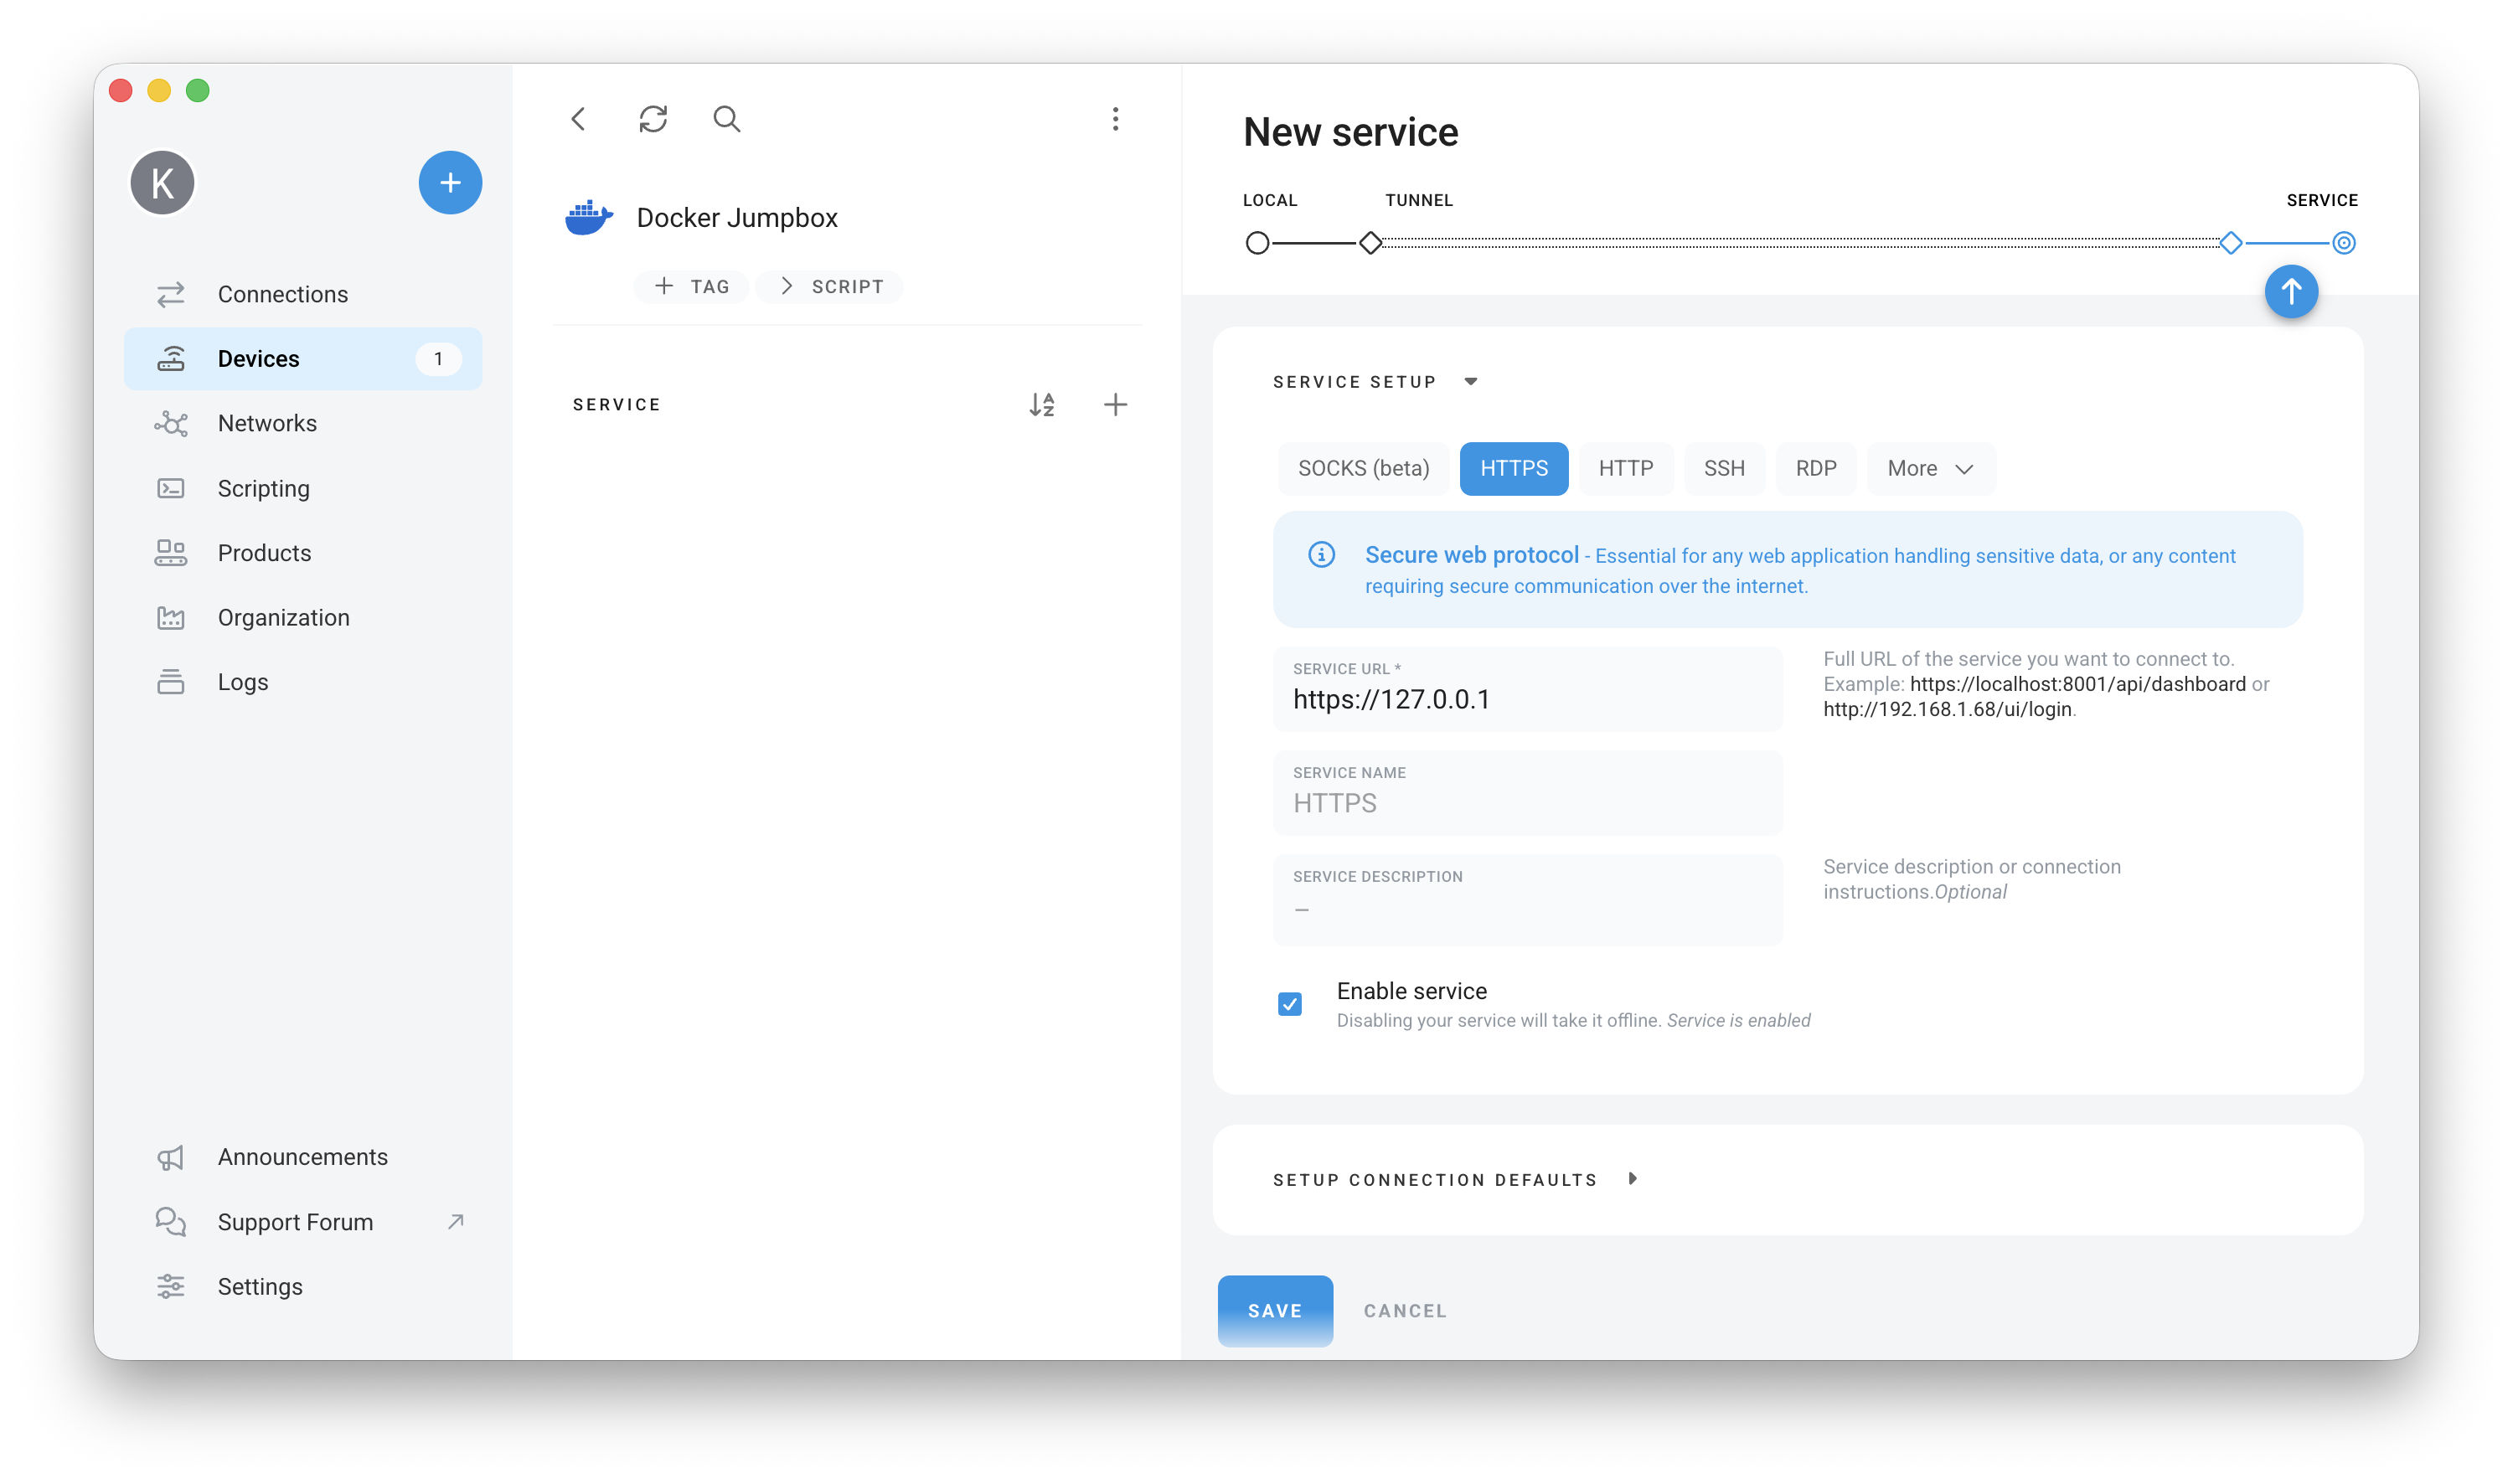
Open your always-on computer in the Remote.It app and click the **+** next to **SERVICE** to add one. You'll get the **New service** form:
First pick the type of thing you're reaching from the row of buttons. **HTTPS**, **HTTP**, **SSH** and **RDP** are on screen; **More** opens the rest, including **TCP** and **VNC**.
**For a web page — a camera, DVR or NAS you'd normally open in a browser**
Choose **HTTPS** or **HTTP**, whichever the device uses. You get a single **Service URL** box — the address and port go in together, exactly as you'd type them at home:
* `http://192.168.1.64` — a DVR on the standard port 80
* `http://192.168.1.64:8080` — the same DVR on a custom port
* `https://192.168.1.5:5001` — a NAS admin page
Then give it a **Service Name** you'll recognize, like `Driveway Camera`, and click **Save**.
**For anything that isn't a web page**
Choose **TCP** (most DVR/NVR phone-app ports), **VNC** or **RDP** (a remote desktop screen), or **SSH**. These give you two boxes instead of one:
* **Service Host** — the local IP address you wrote down, e.g. `192.168.1.64`
* **Service Port** — the port you wrote down, e.g. `8000`
Either way, the address you type is the whole trick. Left at `127.0.0.1` or `localhost` it means "this computer." Typing another device's local IP address is what turns the service into a jump to that device.
Repeat for each camera, recorder or box you want to reach. There's no limit on how many devices one always-on computer can reach this way, and jump services show a small arrow next to them in the service list.
{% hint style="warning" %}
Jump services carry **TCP** traffic. Most camera, DVR, NAS and remote desktop connections are TCP, so this covers nearly everything. A few video streams and VPNs use UDP instead — for those, see [UDP](/features/services/udp.md) and [VPN](/features/services/vpn.md).
{% endhint %}
{% endstep %}
{% step %}
## Connect from anywhere
From your phone, laptop or a web browser at [app.remote.it](https://app.remote.it), sign in to the same account, pick your always-on computer from the device list, pick the service you want — `Driveway Camera`, `DVR App` — and click **Connect**.
Remote.It gives you a local address and port, something like `127.0.0.1:33000`. Paste that into your browser, or type it into your camera app in place of the IP address and port you'd use at home. Everything behaves as though you were standing on that network.
{% endstep %}
{% endstepper %}
## Common questions
**Do I install Remote.It on my DVR or camera?**\
No. Those devices can't run extra software. Install it on one always-on computer on the same network, then point services at the DVR or camera.
**Do I install it on the phone or laptop I'm carrying?**\
No installation needed there. Sign in to [app.remote.it](https://app.remote.it) in a browser, or use the mobile or Desktop app if you prefer.
**What's a "jumpbox"?**\
One machine on the network relaying connections to the other devices around it — exactly what you set up when you added a service with another device's address. You'll see the word in some of our older articles.
**Do I need to change anything in my Starlink router?**\
No. No port forwarding, no firewall rules, no static public IP, no Starlink bypass mode. Remote.It only needs ordinary outbound internet access.
**Can I let someone else use my connection?**\
The connection address you're given works only on your own machine. To give someone else access, share the device or specific services with them from your account — see [Device and Service Sharing](https://support.remote.it/hc/en-us/articles/360051386511-Device-and-Service-Sharing-Overview). You control which services they can reach and can revoke it at any time.
**Will this eat my Starlink data?**\
Very little when idle — a device that just sits online uses roughly 14 MB a month, plus about 7 MB per service. Video you actually watch is the real cost. See [Use Cases](/introduction/get-started/use-cases.md#cellular-or-starlink-devices) for exact figures.
**My connection worked and now it doesn't.**\
Check that the always-on computer is powered up and online, and that the camera or DVR still has the same local IP address. A changed address is the usual cause.
## Still stuck?
* Ask in the [Remote.It community forum](https://forum.remote.it)
* Email
---
# Agent Instructions
This documentation is published with GitBook. GitBook is the documentation platform designed so that both humans and AI agents can read, navigate, and reason over technical content effectively. Learn more at gitbook.com.
## Querying This Documentation
If you need additional information that is not directly available in this page, you can query the documentation by asking a question.
Perform an HTTP GET request on the following URL with the `ask` and `goal` query parameters:
```
GET https://docs.remote.it/introduction/get-started/starlink.md?ask=&goal=
```
`ask` is the immediate question: it should be specific, self-contained, and written in natural language.
`goal` is what the user is ultimately trying to achieve, the reason they need the answer. Sharing it helps GitBook give you a better, more relevant answer. A goal is most helpful when it describes the outcome the user wants rather than restating the question. For example, with `ask=how do I create an API token`, a goal like `automate deployments from our CI pipeline` lets GitBook tailor the answer to that use case.
The response will contain a direct answer to the question and relevant excerpts and sources from the documentation.
Use this mechanism when the answer is not explicitly present in the current page, you need clarification or additional context, or you want to retrieve related documentation sections.